Friday, May 13, 2016

Pretty Fabrics Part 2: Grain and Stretch

Continuing our discussion of fabrics, we are going to talk about two things today: Grain and Stretch.

What is fabric grain? The short answer is the direction the threads in the fabric have been woven, or in the case of knit fabrics, "knitted."

It matters because if you cut your fabric off grain, you can end up with twisting, stretching or draping in your sewn garment when those things shouldn't be there.

Let's say you buy one yard of a woven fabric. And this fabric is a flannel and is 42" wide. Not all fabrics will be the same width. Quilting cottons are usually 44" wide, knits are usually wider with 60" being a popular width. But I digress. You will notice trends in widths based on fabric types the more you shop for them.

After cutting this particular fabric at one yard (36"), we have a rectangle which measures 36" x 42".

(This picture was taken after the fabric was washed, so it did shrink a little bit. You can also see how the edges frayed as this is a woven fabric.)

Here is said fabric:


I have labeled the selvage, cut edges, lengthwise grain direction, cross grain direction, and bias direction.

The selvage edges are the ones that weren't cut and didn't fray when washed, or frayed minimally. The distance between the selvages is the original width of the fabric, in this case 42". The edges that frayed are the edges that were cut off the bolt when you purchased your yard of fabric.

The lengthwise grain direction or simply sometimes called the grain is parallel with the selvage edges. There shouldn't be any stretch when you pull the fabric in this direction (in wovens.)

The cross grain direction runs perpendicular to the grain direction and selvage edge. There might be a little stretch or give when you pull the fabric this way. If it's a stretch woven, this should be the direction the stretch runs.

The bias direction runs diagonally across the fabric. When pulled in this direction, there should be a good amount of stretch. This is why you do not want to cut your fabric willy nilly, if cut on the bias you will get a lot of stretch and your garment will not hang correctly. These stretching properties can be used for good, however. For example, you cut the fabric on the bias when you want to make bias tape, which should have some stretch. Here is a link to a blog post about bias tape, we will not cover it at this time, but you can read more about it if you want to know more.

When using a pattern, it should specify which way the grain should go when cutting out your fabric. Line up this grainline marking parallel with the grain line on your fabric. We will talk about this again when we talk about using patterns.

If creating your own pattern, you will want to remember that any stretch in the fabric should go around the body. Just to get an idea of what I'm talking about, pull on your t-shirt, notice the direction of the stretch on the body and sleeves.

The fabric I used above was a woven, think of the threads in the fabric as threads in a wicker basket. They should be perfectly aligned at 90 degree angles like a perfect tiny checkerboard. But sometimes they aren't and get off grain. This is a great blog post for understanding what off grain looks like and how to get it back on grain. (Click on the link for more info.) For our beginner projects, this will not matter much, but it will once we start cutting bigger pieces and making apparel. This will be something to have in mind later. Don't let this information overwhelm you at this point, if you are like me, the best way to learn is simply jumping in, doing it, and learning from your mistakes. So for now, make a mental note of this and when you are more comfortable with the sewing process, come back and visit this later.

Now, we have been talking above wovens. Let's chat about knits too. The same terminology and labels still apply, but knit fabrics behave a little bit differently.

One difference is that in knit fabrics, the cross grain direction will have some stretch for sure. Some fabrics will also stretch in both directions, which is what is referred to as having four way stretch. If they only stretch horizontally, or across the cross grain, they are called two way stretch. These names confused me until I thought of it in the following way:


I had been thinking about it as two possible directions, horizontally and vertically, so once I figured that out mentally, it was an ah-ha moment. I was thinking, how can four way be possible? There are only two possible directions? Nope, I was just confused.

Don't laugh at me, we have all been there. I was also that kid who couldn't figure out my right from my left until I was embarrassingly old. Why does left change every time I turn around? See, my brain needs to figure these things out on its own.

Stretch percentages will matter too when it comes to selecting the right fabric for the job. However, we will cover this later when we learn about sewing with knits. I don't want to overwhelm you at the moment. It's not difficult to figure out how much stretch a fabric has, but not too important at this time in our series.

Another thing that is different about knits, is how to tell if you are truly cutting your fabric on grain. As it is not woven, the tutorial I linked above isn't quite accurate. Sure a good pressing before you cut out will be a good idea, but when you cut, you should take a close look at your fabric. Here is a very close look:


Do you see rows of lines? Those are your grain lines and what you should ideally line up your grain line markings in your pattern pieces. You can also tell that my fabric would benefit from a good pressing and being laid more straight before I cut it.

Here is the same fabric zoomed out, isn't it pretty?


Some fabrics, such as rib knit, will have very obvious lines. Some such as the one above, need a very close look.

Here is one more close look, this one is the purple one that is pictured up where we looked at the two way vs. four way stretch fabric:


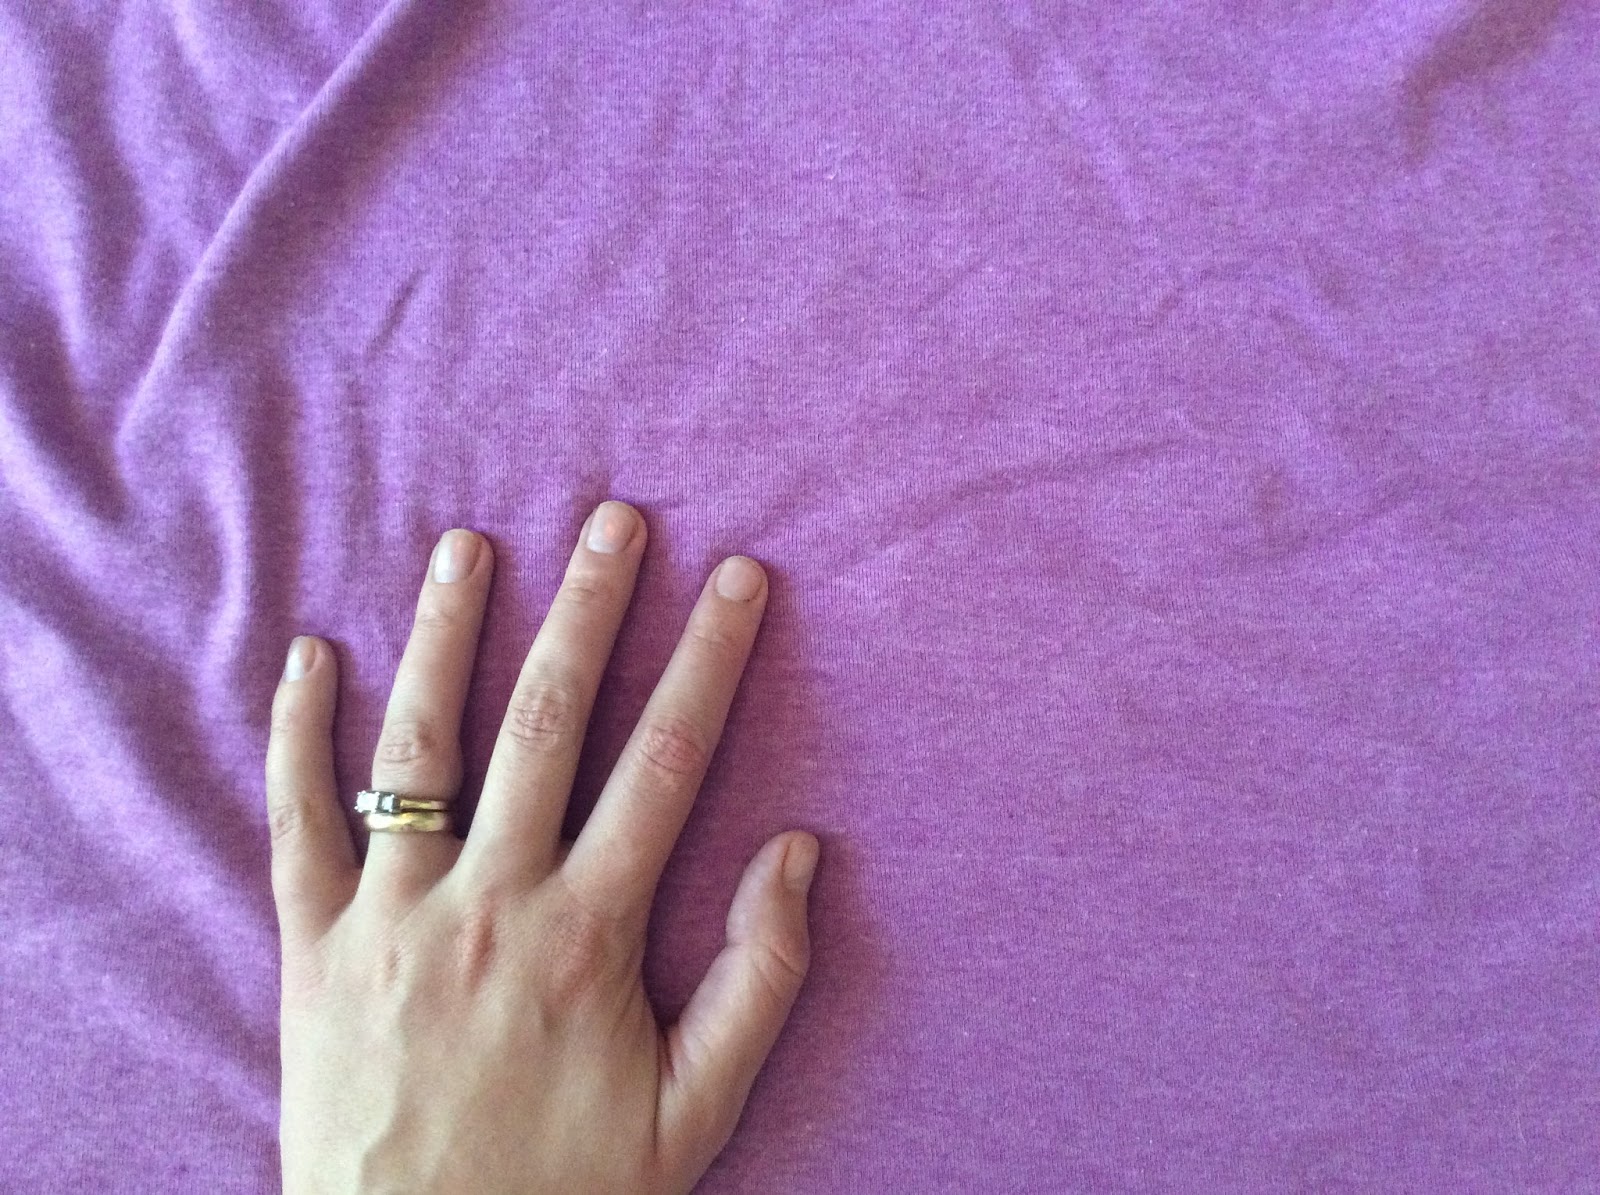
One more look at the fabric at a regular size (my hand shows the scale.)


Finally, another difference with knit fabrics is that the cut edges will not fray. Some, but not all, will roll on the cut line.

When I first started sewing, I didn't know much about the grain line. I knew not to cut diagonally, but that was about it. As you start out, don't let this information scare you. Simply do your best, and learn from there.

This concludes our first week of our learning to sew party! Woo hoo! Next week, we will actually make some projects, I promise.

Your homework in the meantime is to find your manual. Look online if you can't find it. If you can't find the manual online, look on youtube for a video about threading your machine or any information you can find about your specific machine. If you really can't find anything, let me know. I will help or try to find someone who can.

In your manual, read the parts about all the parts on your machine and how to thread it. We will cover this on Monday, but you need to know how to thread your specific machine. Try to figure out how to thread it with your manual or a youtube video. 

I will be here to help first thing on Monday. See you there!

Thursday, May 12, 2016

Pretty Fabrics Part 1: Wovens vs. Knits

Sorry for the delay with this post! It looks like my calendar of events in this series will be a little messed up, but no worries. Let's keep at it. 

It's time to talk about one of my favorite topics in life: pretty fabric! 

Choosing the right fabric for your project is an important step to the sewing process. There are so many options, and while it is fun to play around with different choices, you should know some basics when you make your fabric selection.

The two big categories in the fabric world are woven or knit. There are a few fabrics that do not fit in either of these two categories (felt and fur for example), but not many.  

Woven Fabric:
  • Like the name implies, the threads are woven together to create the fabric, think of a wicker basket on a much tighter scale.
  • Will typically fray when cut. You will need to finish the seams (we will discuss this later) to avoid further unraveling after sewing.
  • Typically do not stretch or have very little stretch vertically or horizontally. There are a few exceptions, such as stretch twill or denim, but not many. (Side note: in all wovens there will be some stretch diagonally, which is called the bias, we will discuss this when you talk about fabric grain. We are talking about the lack of stretch vertically or horizontally.)
  • Tend to be easier to sew on a sewing machine due to stability (for most fabrics, but there are some slippery wovens that are difficult to work with) and lack of stretch.
  • Examples include: quilting cottons, denim, linen, silk, chambray, seersucker, flannel... and many more!
  • Examples of clothing items sewn with woven fabric: button up shirt, jeans, shorts/pants (although these can be also made with knit depending on the pattern) just to name a few.


Knit Fabric:
  • Like the name implies is created by a knitted process with interlaced loops. 
  • Does not fray when cut. (Although some, such as sweater knits will shed. Most knits, however, do not fray or shed.)
  • Will stretch, although the stretch percentage will vary vastly between different fabric. Some will stretch horizontally only (called two way stretch) and some will stretch both horizontally and vertically (called four way stretch).
  • A little bit trickier to sew, as the fabric can stretch out when you sew, the edges curl on some fabrics which is annoying, and a stretch stitch is usually needed to avoid popping stitches if the item is stretched when worn. It doesn't have to be scary though, we will talk about sewing with knit fabrics during part 2 of our sewing series.
  • Examples include: jersey, interlock, ponte de roma, rib knit, french terry... and many more!
  • Examples of clothing items sewn with knit fabric: t-shirts, sweaters, leggings, actually it is used very frequently in apparel. It's comfy and it stretches, so it's a natural here!


Woven and knit fabric cannot be distinguished from each other based on fiber content alone. For example, both cotton and knit fabric can be 100% cotton. They can both be polyester or contain spandex, or many other possibilities. However, a 100% cotton woven and 100% cotton knit will look and behave differently. 

When using a sewing pattern, it should list fabric recommendations. Using the wrong fabric just will not work in many circumstances without making changes to the pattern. For example, leggings are drafted with negative ease, meaning they will hug your body tightly. If you use a fabric with not enough stretch, you might not be able to even get them up past your thighs. Same with a tee pattern, if you don't have enough stretch, it might not fit over your head or over your curves. Likewise if you use a stretchy knit when the pattern calls for a woven, it might drape strangely and not fit as the pattern intended. Until you have a good feel for how patterns are drafted and how different fabrics behave, it's best to stick with the recommendations in the patterns.

There will be some patterns that list both wovens and knits as recommended fabrics. Certain pants or shorts are an example. Still, they might list different types of wovens or knits based on drape or some other characteristic. So pay attention to those lists before you sew.

Lastly, and this is something you will want to remember: PREWASH YOUR FABRIC BEFORE YOU CUT INTO IT! A lot of fabrics will shrink (or if they don't, you will still want to wash all the dirt they have been collecting in the factory and in the store) and the last thing you want is for your new perfectly fitting t-shirt to shrink after you sew it. And even if you can still fit into it, it might pucker in spots or hang strangely as the thread you used will not shrink but the fabric will. I wash and dry all my fabric as soon as I bring them home and before I put it with the rest of my stash. I use color catchers and wash it all together, those might be something you want to keep in your laundry room if you start growing a fabric obsession.

I will leave you with a few pictures of items I have sewn and the type of fabric I used. Hopefully this helps a little, but please feel free to ask any questions you might have.


All of the following three dresses were made with quilting cotton (a woven.) Although as the name implies it is used in quilts, it is also popular in apparel sewing as it is easy to work with, usually fairly inexpensive (although there are pricey designer options) and has a very large selection of prints and colors. Quilting cotton is a great fabric to use for your first sewing projects. 


This next dress was made with a yellow sheet (a woven), which I'm assuming is 100% cotton, and with grey seersucker (also a woven.) The pink fabric in the flower in a quilting cotton.


These skinny jeans were made with a stretch bottomweight (a woven), but I can't remember the exact fabric type. 

This peplum shirt was made with interlock (a knit.)


This blue and grey striped shirt was also made with interlock and the cargo pants were made in a linen blend (a woven.) Interlock is a great knit to sew with, as the edges do not curl and it is very stable, but it doesn't have as much stretch as some other knits and it might pill with washing and drying.


This maxi dress was made with a jersey (knit), fiber contents unknown but it has decent stretch, and the binding around the neck and sleeves is a cotton spandex (a knit.) You might see the term Lycra used instead of spandex, as it is a common brand name. Besides the branding, they are the same thing. 


This next shirt was made with a jersey fabric which was 50% cotton and 50% polyester. It had very little stretch for a knit (20% stretch.)


Both of the fabrics used in this hoodie dress are cotton Lycra. Both fabric have excellent stretch and would also have been a good choice for leggings. 


This black dress was made with ponte de roma fabric. It is a heavy and stable knit fabric with little stretch. 


Finally, the shirt in this outfit was made with a rayon spandex fabric (knit) and the shorts were made with a stretch sateen (a woven.) 

Tomorrow, we will go over how to figure out stretch percentages and fabric grain. 


Tuesday, May 10, 2016

Let's get this party started! Go get your party supplies!

What do you need to start sewing?

Unless you plan on sewing everything by hand, which is possible, you will want a sewing machine. I am not the person to teach you how to sew by hand, so get a sewing machine if you want to join this party. 

That was obvious, but what else will you need?

-Fabric, duh. We will talk more about different types of fabric tomorrow.

-Sewing machine needles. Different types are needed based on what fabric you are using. We will cover this when we talk about different types of fabric.

-Seam ripper. When I first started sewing, I was convinced this would be optional. Like, if I never messed up, I would never need one right? Hahahaha, that was a laughable thought. You will need one. You will mess up. Go buy yourself one. Or two, they like to grow legs and wander off. I spend more time looking for the seam ripper than anything else.

-Thread. Once again, there are different types and it can seem overwhelming. I generally use all purpose polyester thread either Coats and Clark or Gutterman. Some machines are more finicky with lower quality thread (the lower quality threads can lint up machines.) I haven't had a problem with either of those two brands (Some do not like Coats and Clark,), but this might be something you look into more as you dive further into sewing. Also, because I'm a huge nerd and was a science major in college, I found this blog post to be a fun visual of different thread as seen under a microscope. Here is another helpful blogpost which shows how to assess thread quality. Now, different types of thread might be needed for different projects, here is one more blog post you might want to check out. This one shows uses for different types of thread. Like I said, I use polyester thread (usually labeled "all-purpose") for most of my sewing. By the way, the last blog post I linked was found at Craftsy, which is a great resource for learning more about sewing.

-Straight pins or sewing clips

-Fabric Scissors. Buy yourself a pair of scissors designed for cutting fabric that will be used for nothing else other than cutting fabric. Write "FABRIC ONLY, IF YOU USE THESE FOR ANYTHING ELSE, I WILL PERSONALLY USE THESE SCISSORS ON YOU NEXT!" on them with a sharpie. Congratulations, you are now a seamstress, protect those scissors at all costs. 

Ryan Gosling understands:

But Andy Dwyer doesn't. Someone please tell him it's because they need to stay sharp. Paper, or many other things, will make them dull a lot faster than fabric will. Cutting fabric with dull scissors is just no good.


You do not need to go out and buy expensive scissors. Although there are some  pricey options out there, you can get decent scissors inexpensively. If you decide that sewing is a hobby you want to invest in, feel free to buy the more expensive option at that time. I have been doing just fine with my Fiskars that I purchased with a coupon at JoAnn.

-Iron. This one might seem optional, but it is very important. This can make all the difference in how professional your projects will look. Like the scissors, you don't need to go out and buy the most expensive option. For the first few years of my sewing journey, I used the cheapest iron I found at walmart. When it finally gave up on me, I went with the Shark brand to replace it, not the most expensive option by a long shot, but it works great for me. Lots of steam!

Here is a blog post about the importance of ironing if you want to read more. You might notice that the post says how you don't want your items to look homemade, which is a bit of a naughty word in the sewing world. I just thought I would point that out. Handmade, ok. Homemade, bad. Homemade cookies, however, very good. 

-Hand sewing needle. I do hate hand sewing, but it is necessary for certain projects. Not all, thankfully. 

-Measuring tape. This will be important when we sew apparel. Because of vanity sizing in the stores, you can't just assume you can sew the same size when it comes to patterns. You need to go off your measurements and not the size you typically wear. The sizing can also vary between different pattern designers.

-Paper scissorsThese can be your regular household scissors, just as long as they aren't your fabric scissors. If you have scissors you use around the house already, you can just use those and continue to use them as you normally do. These will be used for cutting patterns, wether they are patterns you drafted yourself, paper patterns or patterns you printed.

If you are drafting your own patterns, you will need some paper. You can use what you want, but freezer paper is awesome. After you draw your pattern on it and cut it out, you can iron it directly to the fabric to cut out the fabric. And you can reuse and iron it again and again. That being said, I rarely use freezer paper because I tend to just print whatever pattern I need from my collection of PDF patterns, but if you find yourself tracing patterns or drafting your own frequently, you might consider getting freezer paper.

If you are printing PDF patterns (more on that when we talk about patterns in Part 2), you will need the ability to print and tape or a glue stick to attach your pages together.

Lastly, a serger is completely optional. I have one, but I didn't buy one until I had been sewing for several years. It is great for sewing knits and for finishing seams but you absolutely do not need one. I won't cover using a serger at all during our series. It will just be somthing to keep in mind should you choose to dive further into sewing later.

There will be some things you need for certain projects like buttons, zippers, elastic... but we will cover that if we come across such a project.

Here are specific items you will need for each project in PART 1, not including fabric or other sewing basics. All projects, except for the skirt will require very little fabric. Let me know if you want more specifics on the fabric requirements for any of these projects before the tutorial is posted.  Remember you are not committed to complete all of these. Just choose which one (s) you want to do:

Hair Bows: If you want to glue these to hair clips, you will need alligator clips, ribbon for lining them and glue (I use a hot glue gun when doing hairbows, but other glues will work too.)

Baby Paper: I bought actual plastic baby paper here, but other people have made these with other plastic, such as cereal bags or baby wipe packages. Ribbons are optional if you want to make this into a taggie type of baby toy.

Small Bean Bag Toy: Something to fill them such as dry beans, rice or poly pellets (found at craft stores). I used rice in some I made a couple years ago and they are still going strong.

Skirt: Elastic: I used 3/4" elastic, but you can use anything wider if you wish.

Here is a little preview of the first two projects, the hair bows and the baby paper. You can do this!


Have I fogotten anything? Please let me know if I have, or if you have any questions.

Monday, May 9, 2016

You are Invited to a Learn to Sew Party!


Welcome to the First Annual Megatastic World Famous Ma Moose Learn to Sew Party.

I just made that up. Sorry I'm just really excited. That's not really a thing.

But...

Let's have a "Learn to Sew Party" anyways. Sound fun? (This is where you say "Yes!")

I often get asked to teach someone to sew or hear the sentiment that it would be nice if they were good at sewing.

Here's the thing, if I can do it, so can you.

I had zero desire to learn how to sew until my oldest kids were toddlers. I somehow started reading sewing blogs when I searched online for hairbow tutorials. It was an instant obsession. And I mean obsession, I pretty much dream in sewing now.

So now, here I am. I am not going to teach you everything I know, nor am I going to reinvent the wheel here. There are lots of good sewing blogs and tutorials available already and I will share some helpful blogs during our series.

What I will do is create an opportunity for anyone willing to get their sewing feet wet, ask questions, have fun and just go for it. It's really the best way to start. Don't worry about messing up. My seam ripper is my best friend, it's all good.

This party is for you if you:

-have never sewn before and are interested in giving it the good old college try.

-have sewn before, but want to jump back in and need a little push.

-enjoy sewing already, want to try some new projects and help others fall in love with the obession, lifestyle hobby themselves.

-are basically a sewing guru and are willing to hang around to help answer questions and pass on knowledge to beginners (and to me too, I am always willing to gain more sewing knowledge!)

Basically the only requirement is that you are willing to use a sewing machine and want to party with me.

There will be two parts to the series.

Part 1:
We will learn basic knowledge, such as threading our machines, sewing basic stitches, different types of fabric... Projects will include: hairbows, baby paper, and a basic skirt. If you have sewn before, this might be a little boring for you, but please feel free to help answer questions or offer encouragement to those starting out.

Part 2:
Moving on to my bread and butter, and the reason I started sewing in the first place: apparel sewing. We will talk about how to read patterns and general clothing construction. Projects will include basic pants, peasant dresses, leggings, and t-shirts.

Phew, that's a lot to cover! We will go relatively slow, but I don't want to drag this out forever. I need to send you out into the wild wonderful world of sewing at some point! My goal is to cover part 1 over two weeks and when we get to part two, I will slow down and cover one new type of clothing each week.

Here is the tentative schedule for Part 1:


By participating in this party, you do not have to sew every project we discuss. If you find another project you want to work on during this series that you find helpful, that's fine too. Any tutorial or sewing project you find online or in a project book or wherever is fair game. The point is to jump right in.

However, I would love to see what you are working on and be here to answer any questions you may have. I have created a Flickr group where you can upload photos of projects you made during this series. Feel free to join the group here. This will be a fun way to also see what other people have made too, and comment on each other's projects.

I have also made an Instagram account if you would rather share with hashtags. I'll be honest, I have never used Instagram before. I think I get it, but we will see. If you want to share projects there, use the hashtag #mamoosesewingparty. (DidIdothatright?) My instagram name is mamoosehandmade.

Since this is my first series of this nature, this will allow me to see if I prefer sharing with a Flickr group or with Instagram. Share your photos of your projects whichever way you prefer, and hopefully next time I do something like this, I will have a better clue of what I am doing.

I'm very excited to kick this thing off, and hopefully make more sewing friends along the way. If for some really strange incomprehensible reason you decide you hate sewing, I promise to still be your friend. :)

If you are planning on sewing along, either as an eager newbie or experienced seamstress to keep us in line, please comment below. I would love to see who is partying with me!

Check back tomorrow for a list of sewing tools you will need. (Hint: one is a seam ripper.)

Tuesday, May 3, 2016

Pattern Review: Summer Caye by Love Notions

Disclaimer: this post contains affiliate links. I receive a small compensation should you make a purchase from said link.

I have been busy sewing lately, just not so busy blogging about it.

But I am really excited to share a new pattern I had the pleasure of testing: the Summer Caye by Love Notions. 

This is a pattern for flowy wide leg shorts, capris and pants with some fun options for girls and women.

And they are awesome. I haven't been this excited for a pattern in a long time. There are some great patterns out there, but I think this is one I will be able to use a lot to fill up my wardrobe. I have a big need for summer staples in my wardrobe... that aren't maternity, or jeans. I'm determined to wear more shorts this summer. I'll even shave my legs! Woo hoo! Summer goals.


Seriously, those legs need some sun. 

These shorts are so comfortable. The front waistband is flat with interfacing and the back has elastic. This means they are pull on with no buttons or zippers. And like I said, comfortable. 

I used stretch sateen for this floral pair of shorts. The pattern calls for flowy type of wovens (rayon challis, linen, peach skin...) This fabric had some flow but not quite as much as the recommended fabrics. I also have some stretch sateen in my stash that aren't flowy at all, so keep this in mind when fabric shopping. The more flow, the better these will drape. 

For my daughter, Kylie, I used linen for a pair of capris and rayon challis for a pair of shorts:


For these shorts, I made her take pictures right after school. She was very excited for the shorts, but not excited to take pictures. Haha, can you tell how forced her smile is? Lesson learned, no pictures right after school.

The linen was very easy to work with, the rayon challis, not as much. But using a lot of pins (something I normally get lazy about) helped and I absolutely love the result. I think I need to make myself a pair of rayon challis wide leg pants from this pattern next. It is so soft. 

Let's talk options.

My shorts: 6" inseam shorts, front pockets, omitted back pockets.

Kylie's capris: Capris with tulip hem, front and back pockets omitted.

Kylie's Shorts: 6" inseam shorts, front pockets, back pockets omitted.

Other options included in women's pattern: wide leg or palazoo (wider than the wide leg) widths included for the capris and full length pants which can be hemmed straight, with a split hem or tulip hem. There are also two lengths of shorts, 9" or 6" inseam which can be cuffed or straight hemmed. Optional front and back pockets are included.

The options for the girls are the same except for there only being one width for the pants and capris and the shorts have a 4" or 6" inseam option.

I love the tulip hem!
This was one of the first versions done in testing, it still fit and she will wear these, but the rise was made taller and the hips were let out a little in the final version. The shorts were made from the final version and fit wonderfully!

I'm envisioning a pair of full length summer pants with a tulip hem for myself.

As for the front pockets, I love how they are assembled! Although there are two distinct front pockets (duh), they are assembled as one piece, which creates a nice flat front. I didn't have any gaping issues with these pockets as can sometimes be an issue with front pockets. They layed very nicely and the one piece seemed to help hold my tummy in a bit (or maybe I'm crazy, I don't know. Like I said multiple times, these are comfy, ha!)

The inside of the pants/shorts, capris with front pocket. I'm telling you, I love this pocket design.
The pockets from the outside. By the way, the back rise is higher than the front rise as a good fitting pair of pants should be, this is just how I layed them down to take a picture. 

Like other Love Notions patterns, the tutorial is very well written, and the pattern assembly is easy with layers (only print your size) and no trim pages. There is also a troubleshooting guide for how to get your pants to fit correctly since we all know we are all sized differently and we all want our pants to fit well. The pattern itself went through several revisions during testing, so you know you are getting a good base pattern, but the troubleshooting guide is very handy if you need to make personal adjustments.

Hopefully I will be back soon with some more pictures from pants and/or shorts from this pattern. Definitely some pants for those days I don't keep up with my summer goals and don't shave my legs.

In the meantime, here are a few more pictures of the ones I just shared:


By the way, these two patterns (girls' and women's) are on sale until this Friday. You can bundle them for a bigger discount. If anything, at least look at the pretty pictures on the listing. I'm drooling over some of those beautiful pants! Click on the links in the text to check them out.

The grey shirt and red shirt in this blog post are also made from Love Notions patterns. They are slightly modified from the "La Bella Donna" pattern you can find on the same website. I have made so many versions of this shirt pattern, I will blog about it too someday... hopefully!