Tuesday, April 25, 2017

Sewing Up Spring with Ottobre Design

I'm back with another post for the Sewing Up Spring blog tour.

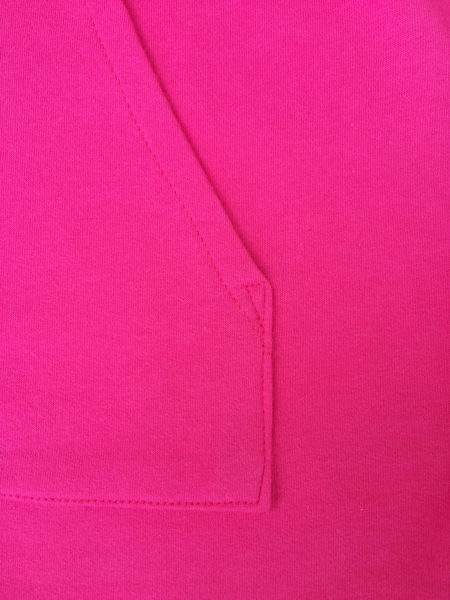
I must think that french terry and kangaroo pockets equal spring because just like in my first post in the blog tour, that's what I sewed again.


I sewed up the "Sunny Side of the Road" dress from Ottobre Designs, issue 2/2107 in french terry from Pretty Posh Prints.

The only modification I made to the dress was to add 1" in length. I'm at the top of the range that Ottobre drafts for which is 164 cm to 172 cm and since this is a mini dress, I knew I would be comfortable if I added a little bit in length. The final length of the dress is included in the pattern instructions, which also helped confirm I needed that extra inch.

The dress turned out wonderfully! The picture below, on the right, is how the dress was pictured in the magazine. I was immediately sold when I saw the picture.

Photo Credit: Ottobre Designs 
http://www.ottobredesign.com/lehdet_js/2017_2/index.html?en

I like to view the designs on the Ottobre website from time to time. When I started looking at the pictures of this particular issue, I knew I needed to buy it. I had bought Ottobre magazines years ago, but had set them aside when I started using more PDF patterns.

I decided to go ahead and subscribe to Ottobre. Even if I don't sew from each issue, I love the inspiration it provides and it's an enjoyable read. However, I am making it my goal to at least sew one thing from each magazine I receive during the first year.

This issue (2/2017) is the women's spring and summer issue. There is so much great inspiration for spring in here! Check out this adorable denim dress and super sweet t-shirt dress:
Photo credit: Ottobre Designs
http://www.ottobredesign.com/lehdet_js/2017_2/index.html?en

Here are the line drawings of all the designs in this issue, you can probably see why I just had to buy this:

Photo Credit: Ottobre Designs
http://www.ottobredesign.com/lehdet_js/2017_2/index.html?en


You can view all the pictures of the designs on the Ottobre website here.

In case you don't have any experience about Ottobre, I put together a quick pros and cons list to help you decide if it's for you.

Pros:
-Value: there are a lot of patterns in one magazine.
-Variety: Each magazine includes many different original patterns. There are tops, dresses, jackets, shorts, pants... in each issue. There have also been underwear, swimsuits, hats, and other different types of patterns in past issues.
-Inspiration: Even if I don't sew a single thing from an issue, I know it was a worthy purchase for the inspiration and the enjoyment I had reading it.
-Well drafted patterns. Consistent grading.
-Instructions are straight forward and complete (however, see the point in the cons list about the instructions.)
-As a Finnish magazine, the Euro style is up to date on trends. As they also have readers all over the world, they are open to requests from their readers and try to accommodate requests and styles from other countries.

Cons:
-Although complete, the instructions are short and sweet. There isn't much hand holding in the instructions. There are no pictures. It helps to have a basic understanding of how to sew the type of garment you are working on.
-The patterns are on several sheets of paper, overlapping each other. It can be a huge pain in the butt to trace them out. But once I wrap my mind around it, I find it relaxing to sit and trace. Others might not agree though!
-There are no measurements for bindings. There are good instructions for how to sew bindings (this has been consistent in all the issues I have read) and instructions for how to calculate bindings based on fabric types. It is expected for you to calculate how long your binding should be.
-You have to add your own seam allowance. It's not what I'm used to but it seems to be consistent with other European patterns (and perhaps others, I'm not sure.)
-This isn't a real con, but I have a little bit of a hard time figuring out the kids sizes sometimes. They use European sizes and the metric system, so I have to do a little more thinking to figure out sizes. It's not complicated though, it just takes my American brain a minute. :)

I hope that helps! I might have more to say about Ottobre as a whole after I complete my goal of sewing from each issue I receive. Besides the dress on the blog today, it's been years since I've sewn an Ottobre pattern.

I am very happy with this sew. I plan on making another one, but will lower the armscye a little bit on the next one. That's not very surprising as I have had to do that on other sleeveless patterns. It's not uncomfortable enough for me to alter this one. I might not even notice if I didn't have sewing experience.


There were quite a few bindings to sew on: the armscyes, the neckline, the hem and the opening of the kangaroo pocket. My double needle got a workout!


I particularly love the neckline, it's a soft V-neck. After binding is applied around the neckline, the V-neck is formed with a small dart. I was skeptical as it seemed like a cheater way, but it lays so nicely!


I really do love this neckline!
Finally, here are just a couple more pictures of the dress. I hope I have helped inspire some spring sewing.


Thanks for stopping by! Don't forget to check out even more spring sewing inspiration on the blog tour with the links below.


April 1- Sewing by Ti

April 3- Sewing by Ti
April 4- Crafty Like a Rox
April 5-The Socially Awkward Seamstress
April 6-The Socially Awkward Seamstress
April 7-Robynne & The Bobbin

April 9-Sew Like A Sloth
April 10-Thats Sew Lily
April 11-Hazelnut Handmade
April 12-DoodleNumber5
April 13-Crafty Like a Rox
April 14-Sewing by Ti
April 14-MaMoose

April 17-AMsews
April 17-Robynne & The Bobbin
April 18-Rebel & Malice
April 19-Very Blissful
April 20-The Fairy Dust Bin
April 21-Sewing by Ti

April 23-On Wednesdays We Sew
April 24-Tenille’s Thread
April 25-Ma Moose
April 26-Margarita on the Ross
April 27-The Socially Awkward Seamstress
April 28-Sewing by Ti

Monday, April 24, 2017

Kangaroo Pocket Tutorial

Recently, I shared this hooded tunic on my blog:


It's the Terra Tunic from Love Notions and you can read more about it here.

The Terra Tunic has optional welt pockets, and while I love them, I wanted something a little sporty for this particular shirt, so I drafted my own kangaroo pocket instead. It's worth mentioning that if you like the welt pockets, but are nervous to give them a go, the pattern includes fantastic instructions as well as a helpful video.  

However, if you want to try a kangaroo pocket, I am going to share how you can add one to your Terra Tunic or any other pattern. You will add the pocket to the front piece before sewing together the rest of the pattern.

I made this tutorial as simple as I could, hoping that a true beginner can follow along.

I made a simple folded edges kangaroo pocket, but there are other ways to make one as well. Other methods include lining the pocket, finishing the open edges with binding, finishing the bottom edge by including it in the seam allowance of a banded hem... to name a few. Feel free to use other techniques if you prefer. I also drafted my pocket with straight lines, although some kangaroo pockets might have a more curved pocket opening. This is just a good base which you can adjust as you please.

To figure out the size of my pocket, I measured a kangaroo pocket on one of my RTW hoodies. (I feel like I've said the words "kangaroo pocket" way too many time already in this blog post. Kangaroo pocket, kangaroo pocket.... sorry!)

I checked that the pocket wouldn't be too large on the tunic I was sewing, as the Terra Tunic is slimmer than my RTW hoodie. It was fine, but it's worth checking you like the size before getting too deep into the project.

I added seam allowance (all edges will be turned under by a half inch) and I came up with the following measurements:


Here is the step by step of how to draw it, for those of you who aren't geometry fans. :)

First, draw a 12" line:


Next, draw a perpendicular line, 8" tall, starting in the center of the first line:


Draw a line perpendicular to the 8" line you just drew, also 8" long, so 4" on each side:


Next draw two lines 3.5" tall, each starting from the edges of the first line you drew, and perpendicular to this line:


Finally, connect the open edges to finish the kangaroo pocket shape. These diagonal lines will be the openings of the pocket. This is the final shape:


Seam allowance (0.5") is already added, use this pattern to cut out your fabric as is. 

Now on to the sewing part. I apologize for the pictures, I took these late at night on my cell phone. Additionally, the right and wrong side of the fabric, as well as the thread that I used are all the same color. If you need clearer pictures with different fabric and contrast thread, please let me know. I would be happy to do these over if there is interest.

Please note: If you are using a fabric that frays, you will either want to finish the edges of the pocket or tuck the raw edges inside the folds as you go. If you are using a fabric that doesn't fray, you are fine following my instructions as written. 

The first step is to fold the diagonal lines over to the wrong side by 0.5". Press well. You will be using your iron a lot to get a nice, crisp pocket.

Sew along the fold lines, close to the edge of the cut edge.

This is what it looks like after this step on the wrong side:


And on the right side:


Press well.

Fold the rest of the edges to the wrong side by 0.5". Press well.

Wrong side:


Right side:


Do not sew those folded edges down yet. You will sew them down after the pocket is situated correctly on the front shirt piece.

Position the pocket, right side up on the front of the shirt, also right side up. The pocket should sit over the belly. You might position the pocket on you where you think it should go and see if your hands fit comfortably in the pocket in that position. For me, it seemed to fit perfectly right over my belly button.

This step is not pictured and is not mandatory: I found it helpful to fold both the front shirt piece and the pocket piece in half and lightly iron down the center seam to mark the middle. I used this crease to align them and make sure the pocket was centered. You could alternatively measure, you just want to make sure the pocket is centered. If you do choose to iron to mark the center, do not over press. You want a very lightly pressed seam that will come out easily when you are done sewing.

Make sure the pocket is centered, and completely smooth on the front of the shirt piece. A lot of pins are helpful.

Sew a straight stitch on the top edge of the pocket, close to the edge of the pocket. Next sew a straight stitch on the sides and bottom edge of the pockets, turning at the bottom corners. Do not sew over the diagonal lines, those are the pocket openings.

Here are the two stitching lines described in the last step: (Keep in mind the one with the sides and bottom edge is one continuous line, turning at the corners.)


To secure the corners and ease up on stress points, I sewed a small triangle at each of the edges of the pocket opening:


And your pocket is done! Please let me know if you need any clarification.

Friday, April 14, 2017

Sewing up Spring with French Terry

Spring! I'm so happy to see you again! As someone who hates winter and cold weather with a passion, I just love this time of year! The windows in the house are all open, the kids are outside playing again, and the promise of summer is in the air.

Today's post is part of the "Sewing Up Spring" blog tour hosted by Sewing by Ti. I am in need of clothes for warmer weather, so I am very happy to be a part of this tour! I sew more when I have deadlines, so this was a great push to sew some clothes that fill a need in my closet.


Someone nearby is burning wood, and the smell coming through the open windows reminds of burning prairie, and subsequently reminds me of spring. If you are from a prairie state, as I am, I'm sure you understand why! Since we moved to the Kansas City area, it is too urban for prairie burning, but it was a yearly occurrence every spring back in the Flint Hills of Kansas where I am from.

I love where we live now, but I do miss that smokey smell this time of year! Not to mention the beautiful sight of watching a controlled fire sweep across the plains, leaving behind a wasteland of ashes. Yet the tallgrass always grows back, reminiscent of the new beginnings and growth that spring symbolizes. So thank you, random neighbor who is burning wood right now, it just feels right to take in that smell as I write this post.

(Side note: My dad used to write a blog and articles about the tallgrass prairie. I used to make fun of him for it, who has a blog about grass? But look at me, I just wrote two paragraphs about the prairie myself. I guess it's in my genes, I can't help it. Don't tell my dad.)

Our weather has been fluctuating a lot lately, which is not unusual, but it does make it hard to know how to dress sometimes. I'm kind of over dressing for winter even if some days the temperature says I should. I'm over winter. Most days now, thankfully, seem to be staying warm and I'm ready to dress the part.

I wanted to make something that I would wear a lot. I'm trying to only sew things that will be in regular rotation in my closet. My every day style is pretty casual, but I love fun colors and prints.

Ti, from Simply by Ti, was kind enough to send me some of her fuchsia French terry and I bought some of her denim colored cotton lycra to go with it. You can find the fabrics used in this blog post here.

I knew immediately that it had to become a Love Notions Terra Tunic (affiliate link*) and Peg Legs (pattern is free if you join their facebook group.) Perfect casual outfit!


French terry might seem like a surprising choice for a spring or summer outfit, but it's exactly what I wanted! I had a RTW maternity dress made from French terry and it was never too hot even when I was nine months pregnant in the summer. So I knew it wasn't a crazy idea.

There is quite a bit of variation with this type of fabric though, it can be polyester, cotton, rayon, with or without spandex... They all feel, stretch, and drape differently and some are more breathable than others. Keep that in mind when choosing your fabric for your project! I wouldn't use a polyester French terry for warm weather. This particular fabric from Simply by Ti is cotton/spandex blend. It is very breathable! It is a nice heavy weight, so I will still have to test it on the hottest days of summer, but today I was perfectly comfortable wearing it in 80 degree weather. It would work great in the winter as well, if I sewed the right garment, I love how versatile the right kind of French terry can be.

It wouldn't be spring in Kansas without some wind!

This fabric was a dream to sew up. It has some four way stretch, but is very stable and easy to work with. I have some left over and I'm hoping that I have enough to make my toddler a summer romper with it. It would be so cute!

This is not my first time making a Terra Tunic, you can read my previous blog post about this pattern here. However this was my first time sewing the V-neck hoodie option. There are six neckline options in the pattern, and I might just have to make them all! It's a soft V-neck, and very easy to sew up. I love it!


I lined the hoodie with an oatmeal colored rayon jersey and I think it's a good compliment to the bright fuchsia!


I sewed up the pattern exactly as written/drafted except for the following small changes:

-I lengthened one inch at the waist on the front and back piece. (That is my usual adjustment to all tops, I love that Love Notions has the bustline, waistline and hip lines clearly marked, it makes it so easy!)

- I added two inches of length to the back piece at the hemline. The back is longer than the front in the original pattern, but I wanted a more dramatic difference.

- I added a self drafted kangaroo pocket. The pattern has optional welt pockets, which are awesome, but I wanted something sporty. If you would like to make your own kangaroo pocket on the Terra Tunic or another pattern of your choice, I made a tutorial which can be found here.

Split hem

I can't keep my hand out of the kangaroo pocket!

The other fabric from Simply by Ti, was the denim colored cotton lycra that I turned into Peg Legs. This cotton lycra is not very heavy but it's completely opaque, so great for leggings that will not be too hot. Because it's not quite as firm as other fabrics I have used for Peg Legs, I decided to slip some elastic in the waistband. It worked great, but now I'm thinking I might just take it out, I have become spoiled by no elastic in my leggings since I started sewing them myself.  I think it will still work just fine and I should have done that in the first place. 

This also would have made a great basic tee or tank, but sadly I used all my fabric on the leggings. Boo. I might have to get more now that I'm envisioning a tank top.
I am very happy with my new outfit! After receiving this fabric, I went back two separate times to order fabric from Simply by Ti. Each time, the fabric shipped right away and I was so surprised by how fast it was in my hands! I used some of Ti's rayon spandex to make this dress, and the rest will hopefully be sewn up soon! Like I mentioned earlier, I desperately need warm weather clothes and I am slowly getting there.

Thankfully, there is lots of sewing inspiration for me on the blog tour. Check out all of the other lovely makes listed below! (Please note that the links will not be active until its scheduled date.)
April 1- Sewing by Ti

April 3- Sewing by Ti
April 4- Crafty Like a Rox
April 5-The Socially Awkward Seamstress
April 6-The Socially Awkward Seamstress
April 7-Robynne & The Bobbin

April 9-Sew Like A Sloth
April 10-Thats Sew Lily
April 11-Hazelnut Handmade
April 12-DoodleNumber5
April 13-Crafty Like a Rox
April 14-Sewing by Ti
April 14-MaMoose

April 17-AMsews
April 17-Robynne & The Bobbin
April 18-Rebel & Malice
April 19-Very Blissful
April 20-The Fairy Dust Bin
April 21-Sewing by Ti

April 23-On Wednesdays We Sew
April 24-Tenille’s Thread
April 25-Ma Moose
April 26-Margarita on the Ross
April 27-The Socially Awkward Seamstress
April 28-Sewing by Ti

*There are affiliate links in my post. I receive a small compensation for any purchase you make using an affiliate link. I have a sewing addiction, so I greatly appreciate it. All opinions are my own and I do not promote a pattern I do not love.